
Prefer not to leave your phone number?
No problem!
Schedule an Appointment at your Convenience
(Only email is required)
Schedule an AppointmentOr Call Now
844-545-1881
 By:
Last Updated: Feb 04, 2026
By:
Last Updated: Feb 04, 2026
Pack your bags, grab your tape guns, and get ready to go. Planning a cross-country move is no small feat, and with a mountain of things to consider, it's easy to feel swamped.
But don’t worry, with a little planning and a solid game plan, you’ll be zipping up those last boxes like a pro. Here’s the breakdown of everything from the must-have packing supplies to the best ways to organize your belongings for the big haul.
You better buckle up because it’s time to turn your moving chaos into a smooth, organized journey.
The key to packing for a cross-country move? Planning thoroughly. It might sound a little bit obvious, but by making a moving checklist, you’re setting yourself up for success throughout the overwhelming process. Figure out what you need and come up with a timeline.
Make sure your checklist covers all the bases: packing supplies, important documents, and a room-by-room packing schedule. It’s the blueprint for making the move a successful and efficient one.
Chances are, you have a few boxes, rolls of tape, markers, scissors, and other packing supplies. But if you don’t or need more, we recommend ordering your moving supplies six weeks before the move.
Make sure you’ve got a mix of boxes, packing tape, bubble wrap, packing paper, and markers on hand. If you need a cost-effective solution to moving boxes (because they can add up) you can always ask your local grocery store if they have any in the back.
If you have more items than you can handle, it’s definitely worth hiring professional cross-country movers. They can help with packing/unpacking and loading/unloading your items for you.
It’s important to look at customer reviews, experience, and quotes from at least 3 different moving companies.
Start the packing process with categories of clothes, books, and kitchenware. It’ll help you identify what you no longer need/use.
Chances are you’ve accumulated a lot of junk over the years, so take an honest look around your home and try to assess what you don’t need when moving into the next chapter of your life. By selling or donating your items, you’ll be gaining some money and you’ll also be making unpacking a lot easier on yourself.
If you have too much junk to handle on your own, consider hiring a junk removal company to do it for you.
Kick off the packing journey with the non-essential items – those seasonal decorations or books that haven’t been read in a year. Getting these out of the way early reduces your stress as moving day approaches.
When packing fragile items like dishes and glasses, give each one a delicate and tight wrap with packing paper or bubble wrap. Then, place them into boxes filled with packing peanuts or other protective materials.
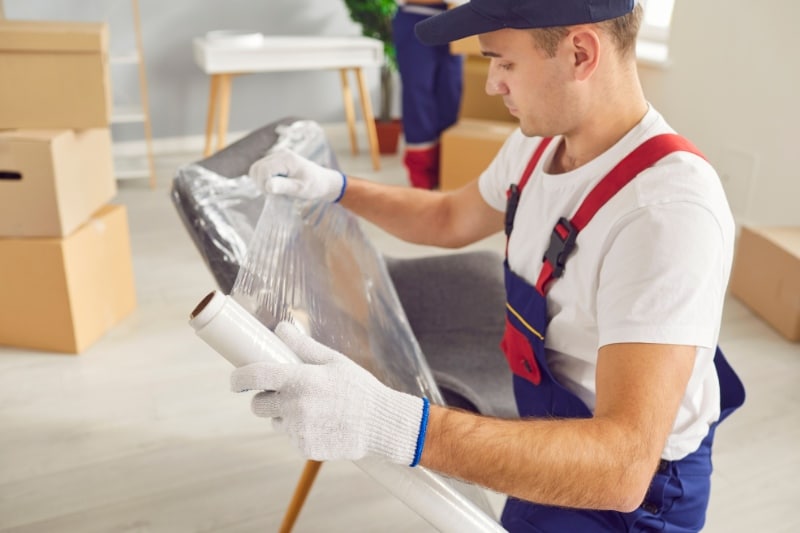
Moving bulky items like furniture can be a bit of a puzzle but with the right steps, this process can be seamless.
First, disassemble what you can. Take apart big pieces like beds, desks, and bookcases to make them easier to handle. Wrap and protect sofas, chairs, or other furniture with moving blankets or plastic wrap to avoid any scratches. For especially heavy items, consider hiring professional movers to handle them.
Pack a small duffle bag or suitcase with personal items you’ll need access to during your move. Things like important documents, toiletries, medications, clothes, etc. With this by your side, you won’t have to stress about searching for important items when you need them.
Labeling and numbering boxes isn’t just a good idea – it’s the X factor when unpacking in your new place. Take the time now to clearly label the contents and room the box should go. You’ll know exactly where everything is, making unpacking a breeze.
Also, label boxes as “FRAGILE” or “HANDLE WITH CARE” if you want the contents handled cautiously.
Load the largest and heaviest items first. Items like mattresses, bed frames, tables, chairs, refrigerators, washer and dryer sets, and couches. Due to the weight and size of these items, they need to be on the bottom of your moving truck so they don’t crush or damage other items.
To save space in your truck, place all couches, headboards, and tables in an upright, vertical position. Provide some extra padding here as well like moving blankets or plastic wrap.
The first rule of Moving 101 is don’t pack your valuables – like jewelry or those irreplaceable family heirlooms – with your everyday items. They need their own VIP club, so keep them in a separate, secure bag that sticks with you throughout the journey.
Items like bubble wrap and tape should have a home at your designated packing station right up until the big day. Trust us, it makes life so much easier when everything you need is right where you left it. Staying organized is the biggest lesson in moving across the country because things can be lost easily in all the chaos.
Pack the packing supplies in their own box to take with you because something unexpected might happen on the road and you may need some extra tape or bubble wrap.
Here’s a little packing hack that might blow your mind: use what you have! Linens and towels aren’t just for the shower, they can also be put to use as bubble wrap. Wrap up those awkward, fragile items like lamps and vases into a towel or linen for protection.
Socks can also be used as a DIY shield for glasses and perfume bottles. As for the sharp objects in your kitchen like knives, tuck them into dish towels and secure them with a rubber band. You’ll be amazed at what you can do with regular, old items around your house, saving you money on packing supplies.
Before you go on a packing spree, pump the brakes and do a little research on what you can’t pack. Moving companies have strict rules about what they can’t haul across state lines, which include hazardous items, perishables, and flammable items. It’s better to ask before moving day if you’re on the fence about a certain item
We recommend starting the packing process at least 6 weeks before your moving date to make sure everything is packed and ready to go.
The cheapest way is to DIY your move. With this approach, you’ll need to rent a moving truck or moving container to pack all of your belongings. These are thousands of dollars cheaper than hiring a professional moving company to do the work for you.
Before you move, it’s a perfect time to lighten your load. Consider selling, donating, or tossing items like old appliances, outdated furniture, or clothes you no longer wear. Ask yourself: Does it work well? Have you used it this year? Does it hold some sentimental value? Can you live without it? These questions will help you determine which items you truly want to take with you.
You’re all set to conquer your cross-country move with these expert tips. Remember, the key to a stress-free move is all in the preparation. Your future self will thank you. Now go get ‘em.
Meet Nik, a dedicated writer with a passion for real estate/moving blogs and, of course… writing. For the past two years, he’s crafted engaging content for a plethora of real estate firms and E-commerce companies, accumulating credibility and experience to be one of the best in the industry. Having relocated multiple times recently, Nik has utilized a plethora of moving companies, gaining valuable insight into both solo and professional moves. Through these experiences, he would recommend moving with professional services, as it lowers stress levels tremendously. When he’s not immersed in his writing, you can find him working on other entrepreneurial endeavors in the real estate/moving space.